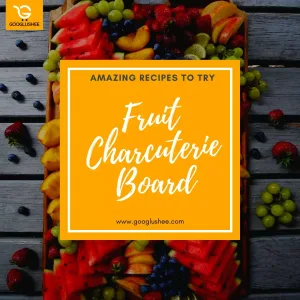
Googlushee‘s Fruit charcuterie board or fruicuterie board both are same things of different names perfect for parties, holidate, and family gatherings. It’s an ultimate pleaser with crackers, cheesecake, fruits as the main ingredient, nuts, jams, and goods. If you are in a hurry, combining such interests is easy to put together with such selections.
Especially in hot summers, everyone finds something eye-catching or hydrating stuff to eat, so choosing fruit and dessert charcuterie is the best option to serve. It’s kind of aesthetically pleasing, fun, and is colorful to serve snacks or appetizers. Fruicuteria board makes use of all favorable fruits and freshes, which look good in summers.
Let people talk! Combining tart and sweets items gives taste birds something scrumptious. Adding a variety of textures and colors gives a good mixture of flavors to the tray. Passion fruits like strawberries, apricots, oranges, fogs, and seasonal picks remain the same for all the charcuterie boards. Although, you can add summer veggies like snap peas and sliced peppers for easy eat to go.
How can I serve the Fruicuteria board?
Table of Contents
Present your idea of making charcuterie board professionally by cutting and displaying fruits. Try puzzling shapes together, layering, and mixing them in the form of making color pops. For a catchy eye look, cut mini slices of strawberries horizontally, then fan them on a platter.
To add structure, you can fan oranges, sliced apples, watermelons in circa le intersecting board, or even you can cut them in heart shape wave across the tray. Slicing or piling large blueberries or blackberries and kiwi in a zigzag cut is fun. For green texture, you can add peel on kiwi or leaves over strawberries.
Keep your fruits safe from oxidation and browning by cutting them in water, or you can brush with some lemon juice too. You must opt to prepare fruits close to serving. You can dress up your board with fun items to fill empty spots. We recommend you cover the base with blueberries, orange slices, nuts, or dried fruits. Give the fruit charcuterie board a finished look with edible flowers, yogurt dips, and seasonal flairs.
How To Make fruicuteria board?
You don’t need any artistry skills to customize your fruicuteria board. Start arranging your board with groups of fruits and treats. Wash out all fruits and place them separately into bowls. Commence with the most significant pieces of fruits first, and then go for small-sized fruits like grapes at the sides of the fruit charcuterie board.
Place the candy pieces and sweets of your own choice on the board. Do the same with small amounts of fruits and other cookies. Keep each ingredient nicely fanned out. Have fun, customize it as a game and enjoy the thrilling vibe of preparing a fruit tray.
Preparation Time: 20 minutes
Total Time: 20 minutes
Servings: 20 persons
Ingredients:
- Red grapes: 1 pound seedless
- Green grapes: 1 pound seedless
- Strawberries: 1 pint
- Blueberries: 1 pint
- Pineapples: 3 cups diced fresh
- Blackberries: 1 pint
- Raspberries: 1 pint
- Mangoes: 2 cup peel or cubed
- Oranges: peeled and sliced 2 cups
- Seasonings: optional
- Chocolate chips: 6 Oz for garnishing
- Chocolate pretzels: 2 cups
- Regular pretzels: 1 cup
- Cookies: 10 to 15 pieces or two packs
- Candy bars: snack-sized 5-6 pieces
Preparation:
Step 1: washing and cutting
Wash out all fruits in a bucket and let them dry. Place them separately in bowls so you can easily design a tray.
Step 2: Arrangements and customization
Before arranging the fruits in your fruit charcuterie board, it is essential to have all your ingredients in front of you. Start with your favorite fruits and treats like the grapes as the most significant fruits first. Arrange grapes on both sides of the servings. Customize your tray like an artist.
Step 3: Fill in gaps
Candy pieces and other goods can be used to fill board gaps. Also, place cookies, candy bars, and chocolate on one side of the fruicuteria. People attract more towards goods items so make your fruicuteria a good fruit and dessert charcuterie board.
Step 4: add dimensions
Use bowls for dimensions to place dips or miniature chocolate bars in it, or you can put cookies too.
Step 5: Decor or servings
You can make dips like chocolate ganache with melted cream and chips. Peppermint whip by adding mint leaves to the rich cream cheese and marshmallow dips by melting them with white chocolate. Marshmallow dip looks yummier with fruits dunk in it .
Hurry Up!!! | Save 570 PKR | Simax Glass Cooking Pot & Borosilicate Cookware


